Monday, October 31, 2011
Carving the Pumpkins
So, its that time of the year where you carve pumpkins! Here are some pictures I took with the pumpkins!


Sunday, June 5, 2011
Wednesday, May 18, 2011
Cupcake Wars!
Lately I have been obsessed with Cupcake Wars. And I thought I just whip a blog post about it:
Yes! cupcake wars! Isn't that crazy? I just stumbled across this video (and yes, it is quite old), but just watch!
This is the start of the real Cupcake wars! My favorite recipe that has been revealed is the Chocolate Chip Canoli Cupcake recipe. It's so heavenly. *Automatically goes into daydream mode* So get your bake on and bake this recipe!

Tuesday, April 19, 2011
Marshmallow Cupcakes
What? Marshmallow cupcakes? I know sounds a bit bizarre, but it's actually really tasty. Here I will show you how to make it. You will need:
Vanilla batter ready to be put int the oven
Marshmallows
Okay so first thing is first, add the amount of marshmallows you want and add marshmallows to cupcake pan and place in oven. Don't worry if you see bumps in cupcakes. It's the marshmallows in it.
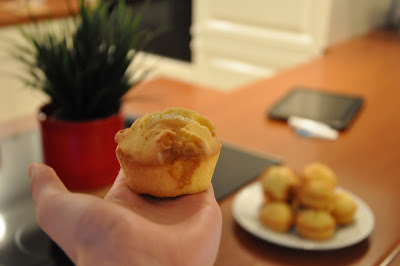
The finished result should look like this:
And these cupcakes taste absolutely delicious!

P.S. If you want icing with marshmallow chunks go for it!
Vanilla batter ready to be put int the oven
Marshmallows
Okay so first thing is first, add the amount of marshmallows you want and add marshmallows to cupcake pan and place in oven. Don't worry if you see bumps in cupcakes. It's the marshmallows in it.
The finished result should look like this:
And these cupcakes taste absolutely delicious!

P.S. If you want icing with marshmallow chunks go for it!
Sunday, April 10, 2011
Fabric Flower Barrette
Anyway, let's get started on the tutorial. You will need:
A long rectangle piece of fabric (this varies on how big you want your fabric flower
Circular piece of felt
Glue
Barrette or hair clip
First get your fabric and tie a knot on one end. Start twisting fabric and wrap around the knot. Until you are satisfied with your flow,r glue end of fabric at back of flower. Snip to holes in felt and glue felt on flower. Insert barrette of hair clip.
If this is to stressful to follow here is an instructional video:
So pretty to wear! Hope this has helped!

Sunday, April 3, 2011
Green Tea Ice Facial
Green tea is an essential for the skin (well, for my skin). I will guarantee you that if you walk into any beauty/cosmetics store you will find something that has to do with green tea. Studies have shown that green tea could protect against cancer, osteoporosis, heart disease, and may aid in weight loss. Also, many believe that green tea in skin products can help ward of skin cancer, zap signs of aging, and rejuvenate skin cells. Research also has shown, green tea extract is rich in antioxidants, which of course are healthy for the skin and protect the body from free radicals. So there is no doubt the green tea is good for the skin... right? Yes!
Take me for example. I bought the Tea Tree Blackhead Exfoliating Wash from the Body Shop and my nose was as smooth as can be (I would recommend the product!). So there you have the benefits of green tea.
Since green tea is brilliant for your skin I found an excellent tutorial for the Green Tea Ice Facial. Here is how I made it.
You will need:
Green Tea
Water
Ice Tray
Toothpicks
First grab your tea bag and put it in water. Once made, add to ice tray. After 1 hour or so, place toothpick in ice.
Note: I forgot to add toothpicks, so it doesn't look like the picture.
Leave in fridge until completely frozen take out and you have a homemade green tea ice for your facial.

Research Sources on green tea:
http://www.webmd.com/skin-beauty/news/20000817/green-tea-could-be-good-for-your-skin-study-finds
http://www.ivillage.co.uk/the-beauty-benefits-green-tea/76175
http://www.amazing-green-tea.com/green-tea-skin.html
Take me for example. I bought the Tea Tree Blackhead Exfoliating Wash from the Body Shop and my nose was as smooth as can be (I would recommend the product!). So there you have the benefits of green tea.
Since green tea is brilliant for your skin I found an excellent tutorial for the Green Tea Ice Facial. Here is how I made it.
You will need:
Green Tea
Water
Ice Tray
Toothpicks
First grab your tea bag and put it in water. Once made, add to ice tray. After 1 hour or so, place toothpick in ice.
Note: I forgot to add toothpicks, so it doesn't look like the picture.
Leave in fridge until completely frozen take out and you have a homemade green tea ice for your facial.
Here is a good video to show you how to make it!

Research Sources on green tea:
http://www.webmd.com/skin-beauty/news/20000817/green-tea-could-be-good-for-your-skin-study-finds
http://www.ivillage.co.uk/the-beauty-benefits-green-tea/76175
http://www.amazing-green-tea.com/green-tea-skin.html
Saturday, March 26, 2011
Suport Japan
Lately Japan has been suffering a lot. A LOT. I wanted to support Japan as much as I can. I stumbled across an article telling me about one unique way I could help Japan... make paper cranes! Of course, I didn't know how to make paper cranes so I went on youtube and found this video:
And my result was this:
Please in support of Japan, make a paper crane and post it to the Facebook Fan Page Paper Cranes for Japan.

And my result was this:
Please in support of Japan, make a paper crane and post it to the Facebook Fan Page Paper Cranes for Japan.

Monday, February 28, 2011
The Perfect gift for your Yoga Friend
Is your yoga crazy friend's birthday coming up soon? Well here is the perfect gift! A custom yoga mat from http://www.mycustomyogamat.com/!
Go through the process and choose which color you want and so forth!

NOTE: All pictures were taken from http://www.mycustomyogamat.com/, except for the screen shot of making the yoga mat.
Go through the process and choose which color you want and so forth!
But not only is can you buy yoga mats, you can buy bags that match your yoga mat, greek mats, baby mats, and dog mats.
I absolutely love this and I will be buying this in the future!

NOTE: All pictures were taken from http://www.mycustomyogamat.com/, except for the screen shot of making the yoga mat.
Saturday, February 19, 2011
Devouring Coffee Cake Cupcakes
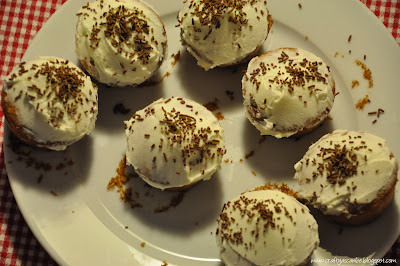
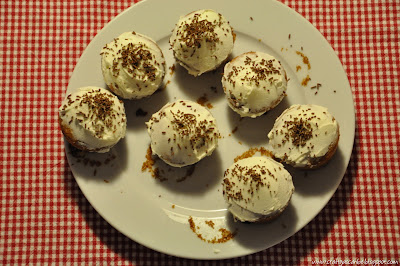
How was your Valentine's Day? My was great and guess what I made? Cupcakes! (That was a little obvious!) Anyway I made Coffee Cake (just get your standard vanilla cupcake recipe and add 1 tbsp. instant coffee dissolved in 1 tbsp. milk), with my favorite buttercream recipe topped chocolate sprinkles.
Here are a couple of pictures I took:
So yummy! Comment below if you want to know how to make these cupcakes!

Here are a couple of pictures I took:
So yummy! Comment below if you want to know how to make these cupcakes!

Friday, February 11, 2011
Valentines Barrettes

This perfect idea poped into my head! Valentines hair clips! I searched and searched online and I found Purl Bee and they have a tutorial on it! Except, I did mine a little differently.
So, with Valentines just around the corner, you don't have any Valentines flair! Well, here is a Valentines Barrette that is noticeable, but not to in-your-face. You will need:
Contrasting felt (red and pink or fuchsia and pink)
A bobby pin or barrette
Purl Bee Valentine Heart Template
Before we get started I'd just want to let you know that I am using red and pink felt.
So the first thing to do is use one of your felts (I'm using red) and cut it out in the shape of the large heart on the template. You will need two of these. Afterwards, do the same with other felt (again, I'm using pink) except cut it out in the shape of the small heart and you only need one.
With one of your large felt pieces make a slit to put in the barrette. If you are using a bobby pin like me, make one slit in the middle and then another slit far off to the other side. Sew both of the large pieces together.
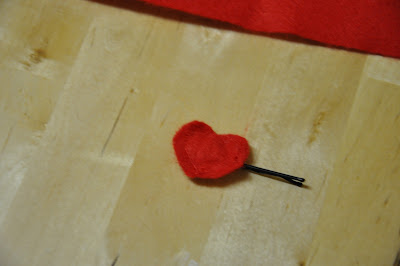
Now take your small pink heart, place it in the middle on the side that does not have the slits in it, and sew straight down the heart. Your result should look like this:
If your looking for more heart shapes or even what the heart looks like with a barrette, please go here:

Subscribe to:
Comments (Atom)


